When a photo PDF is too large to submit, should you lower quality or choose a smaller page? These settings do different jobs: quality changes how the photo is encoded; page size changes its placement on paper.
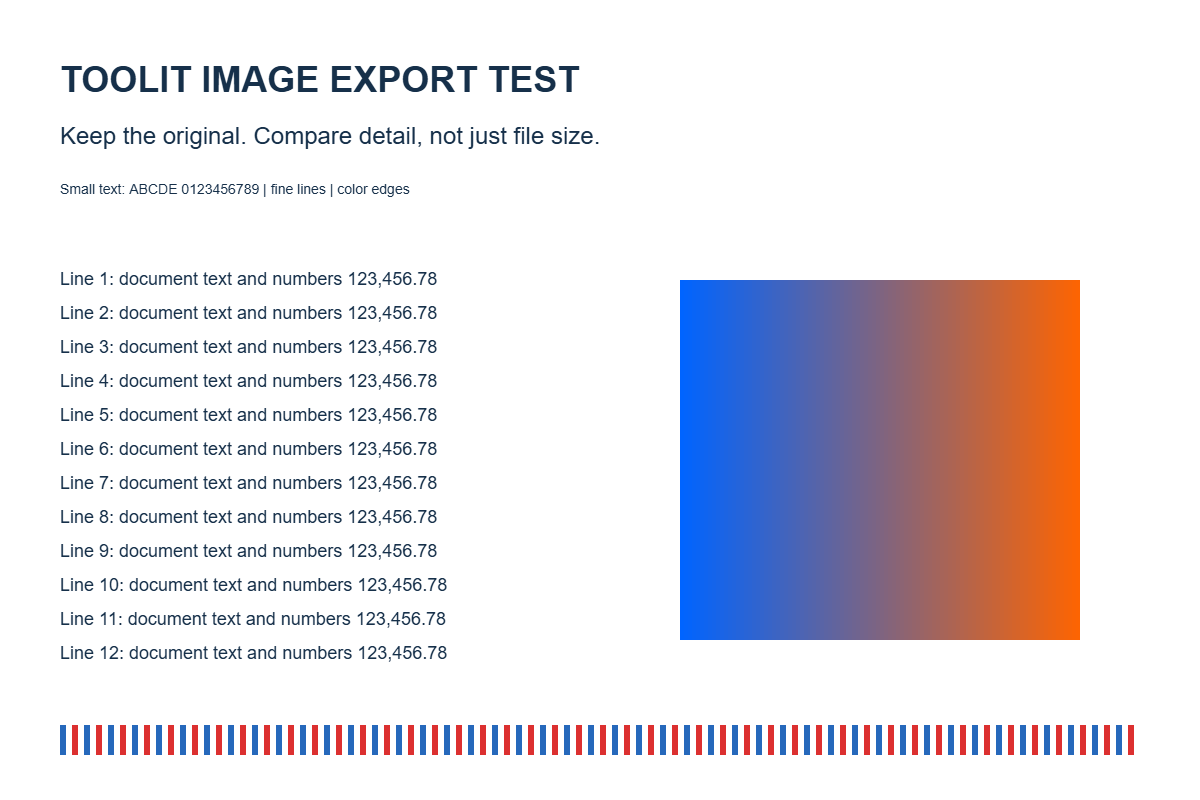
We created six PDFs from a controlled image containing small text, thin lines and a gradient. This tests what the settings change, not which setting looks best across a collection of real photographs.
Three distinctions to make first
At each quality setting, both page modes embedded byte-identical JPEGs. Page layout and image compression were separate.
A4 output grew from 67.8KB at quality 60 to 144.4KB at 95. A setting of 95 does not mean 95% of original quality is preserved.
All six files had zero extracted text items. Recognizing the pictured letters requires a separate OCR step.
We changed quality and page size independently
- 1
On September 26, 2026, Chrome 153 on Windows generated a 1,200×800 PNG test chart. No personal photos or documents were used; the actual source is linked below.
- 2
A separate local experiment page reproduced Toolit's image preparation and placement calculations using the same browser Canvas APIs and pdf-lib 1.17.1. This was not an end-to-end test through every button in the tool UI.
- 3
We tested quality 60, 80 and 95 with automatic A4 orientation and fit-to-image pages. Margins stayed at the default 24 points. The landscape input produced landscape A4; its dimensions did not trigger the image downscaling limit.
- 4
We inspected embedded JPEG bytes and dimensions, extracted text with PDF.js, and rendered all six pages to check for clipping or missing images. We did not test physical prints or readability across multiple phones.
Quality changed file size without changing pixel dimensions
Every PDF contained a 1,200×800 image. Sizes below are for the complete PDF, using 1KB=1,000 bytes. Mean color difference is the average absolute difference between decoded JPEG and source PNG RGB values. Lower is closer to the reference, but it is not a human quality score.
| Quality | A4 PDF | Image-fit PDF | Mean color difference |
|---|---|---|---|
| 60 | 67.8KB | 67.7KB | 1.4882 |
| 80 | 89.8KB | 89.8KB | 1.0946 |
| 95 | 144.4KB | 144.4KB | 0.6867 |
- Higher settings produced larger files and smaller numerical differences for this input. Other images and browsers can produce different sizes and differences.
- The setting is passed to the browser's JPEG encoder. Quality 80 does not preserve exactly 80% of the original information or equal quality 80 in every other application.
- Toolit currently re-encodes inputs as JPEG before embedding them. Transparent PNG areas become white, and existing JPEG files are also re-encoded. These are implementation choices, not inherent limitations of PDF.
A4 versus image fit changed placement, not the stored photo
The embedded JPEGs were byte-identical between page modes at each quality. Complete PDFs differed by 22 bytes because page and placement information differed, not because the images had different quality.
Image fit placed the photo across a larger physical area. The same pixels spread over more inches mean fewer pixels per inch. Making an image bigger on a page does not create extra detail.
| Property | Automatic A4 | Fit to image |
|---|---|---|
| Page dimensions in this test | About 297×210mm | About 334.4×228.6mm |
| Embedded image | 1,200×800 pixels | 1,200×800 pixels |
| Placed-image pixel density | About 108.8ppi | 96ppi |
| When to choose it | Recipient requires A4 | Page should follow the image proportions |
- Fit to image does not recover a photograph's physical dimensions or the paper size of a scanned original. It calculates a page using pixel dimensions and Toolit's layout rules.
- A print application's fit-to-paper setting can change the final printed size again. Check both submission requirements and print settings.
- The current tool reduces oversized inputs to a maximum 5,000-pixel long edge during image preparation. That is confirmed from code, not measured by this 1,200-pixel experiment.
Visible letters are not necessarily searchable text
The test chart contains many lines of letters, but every PDF returned zero text items. Each file stores an image of the letters without adding selectable or searchable text data.
If you need to copy the contents, use image OCR and check the recognized text for mistakes. Toolit's OCR extracts text; it does not automatically create a PDF with a searchable text layer over the original image. A searchable-PDF requirement needs a workflow that explicitly supports that output.
Choose settings in the order your submission needs
Check the recipient's requirements and actual readability before maximizing a quality number. Do not use this chart's file sizes as predictions for unrelated photographs.
| Situation | First step | Final check |
|---|---|---|
| Receipts required as an A4 PDF | Choose A4 and check photo order | Zoom in on amounts and dates |
| PDF exceeds an upload limit | Export again from the same source at lower quality | Total size and small-text damage |
| Blurry document photo | Retake it or obtain a better scan | Quality 95 cannot reconstruct missing letters |
| Transparent logo or fine-text graphic | Decide whether white background and JPEG are suitable | Background color, thin lines and edge artifacts |
| Search and selection are required | Check whether an image-only PDF is accepted | Presence of a searchable text layer |
Source files, measurements and limits
This is one controlled chart, not a real-photo corpus or a print-quality certification. A mostly white image can have a low average difference while small text still shows visible damage around its edges.
Download the actual PNG and compare quality 60, 80 and 95 with default margins and both page modes. Browser, font and library versions can change results; the linked measurements describe this run rather than a universal benchmark.
Official documentation used for this analysis
Choose the required page first, then check readable output
A4 chooses a page; quality chooses an image encoding setting. In this test, changing page mode preserved the embedded photo, while changing quality altered size and difference from the source.
For submission, choose the required page format first, then adjust quality from the same original. Open the final PDF to inspect small text, and separately check whether search or text selection is needed.